
Introduction
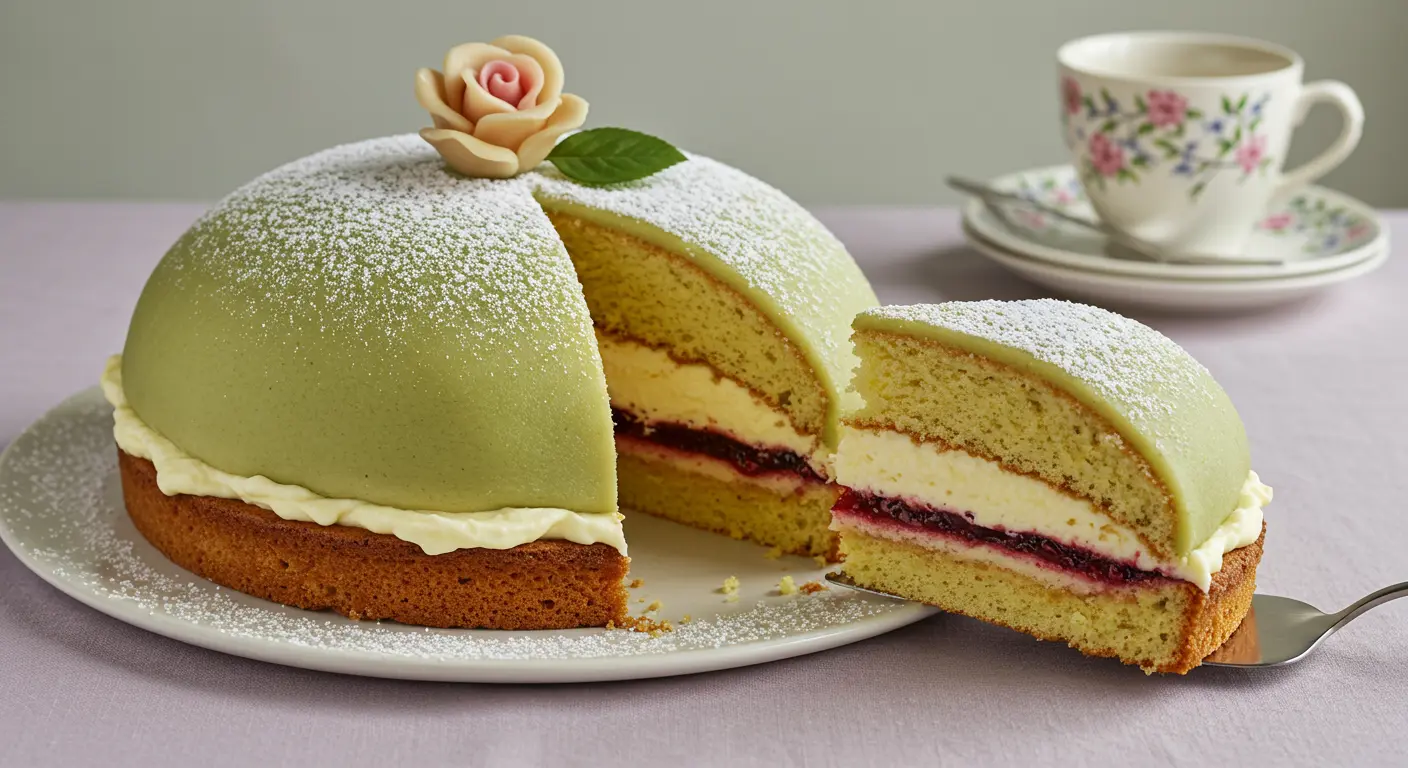
Struggling to create a showstopping dessert that looks professional but doesn’t require culinary school training? A princess cake might seem intimidating with its perfect dome shape and vibrant green marzipan coating, but I’m here to change that perception. This iconic Swedish dessert (prinsesstårta) combines light sponge cake, vanilla custard, and whipped cream under a smooth marzipan blanket – resulting in a dessert that’s as delicious as it is beautiful.
As a pastry chef who spent three years working in Stockholm, I’ve made hundreds of princess cakes and refined the process into five manageable steps anyone can follow. This guide breaks down the entire process – from selecting quality ingredients to achieving that signature dome and decorative rose. You’ll discover time-saving preparation techniques, troubleshooting tips, and creative variations to make this classic your own.
Table of Contents
Why This Princess Cake Recipe Works
- Uses straightforward techniques that work for both beginners and experienced bakers
- Breaks down a complex-looking dessert into 5 achievable steps
- Creates an authentic Swedish experience without specialty equipment
- Perfect for celebrations, holidays, or when you want to impress guests
- Makes a stunning centerpiece that tastes even better than it looks
Choosing the Right Ingredients
The Foundation: Sponge Cake
For a traditional princess cake, you need a light, airy sponge cake that can support the fillings without becoming soggy. Swedish génoise is the authentic choice – it’s less sweet than American cakes and has a firm yet delicate texture.
Look for cake flour rather than all-purpose for the tender crumb texture that defines a proper princess cake. If you can’t find cake flour, you can create your own by replacing two tablespoons of all-purpose flour with cornstarch for each cup required.
Fillings That Matter
The custard in a princess cake should be thick enough to hold its shape but not so stiff it fights the knife when cutting. Use pure vanilla extract or, better yet, a real vanilla bean for authentic flavor. The freshest heavy cream will whip to perfect peaks and hold its dome shape longer.
Marzipan Selection
The signature green covering isn’t fondant – it’s marzipan, which has a distinct almond flavor that complements the cake. For best results:
- Choose high-quality marzipan with at least 50% almond content
- Avoid overly sweet “almond paste” products that contain more sugar than almonds
- If you’re ambitious, make homemade marzipan with ground almonds, powdered sugar, and almond extract
Ingredients & Prep
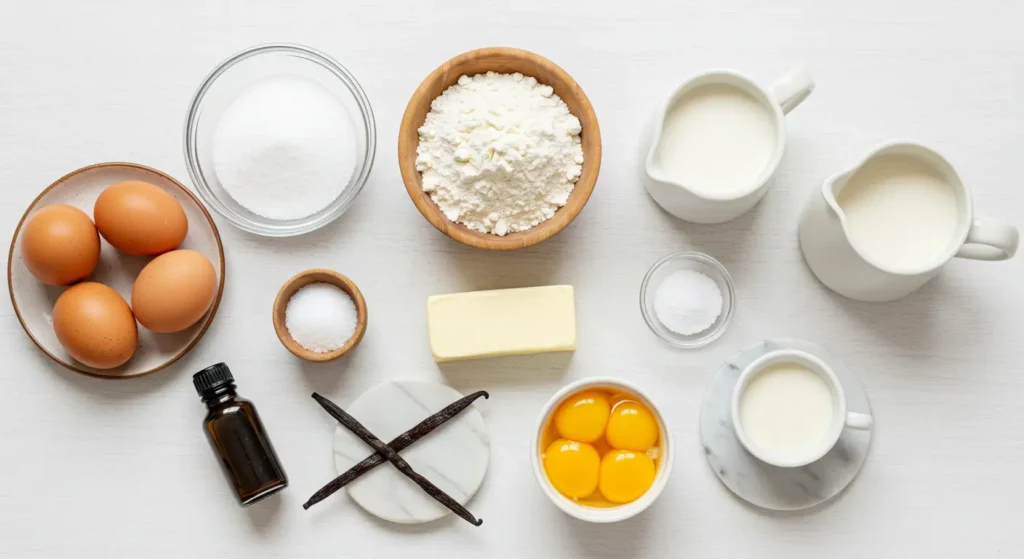
Cake Layer Essentials
- 6 large eggs, at room temperature
- 1 cup granulated sugar
- 1 cup cake flour, sifted
- 2 tablespoons unsalted butter, melted
- 1 teaspoon vanilla extract
- Pinch of salt
Allow eggs to reach room temperature for maximum volume when beaten. Sift the flour multiple times for the lightest texture, and cool melted butter slightly before incorporating.
Custard & Cream Components
- 2 cups whole milk
- 1 vanilla bean (or 2 teaspoons pure vanilla extract)
- 5 egg yolks
- ½ cup granulated sugar
- ¼ cup cornstarch
- 2 cups heavy cream (for whipping)
- 3 tablespoons powdered sugar
Prepare the custard a day ahead and refrigerate for the perfect set. Use the coldest cream possible for the best whipping results.
Marzipan Covering
- 14 ounces good-quality marzipan
- Green food coloring (preferably gel or paste)
- Powdered sugar for rolling
- Small amount of pink marzipan for the rose decoration
Knead food coloring into marzipan gradually until you achieve the classic light green shade. Too much handling will make the marzipan sticky, so work efficiently.
Step-by-Step Cooking Instructions
Step 1: Prepare the Sponge Cake
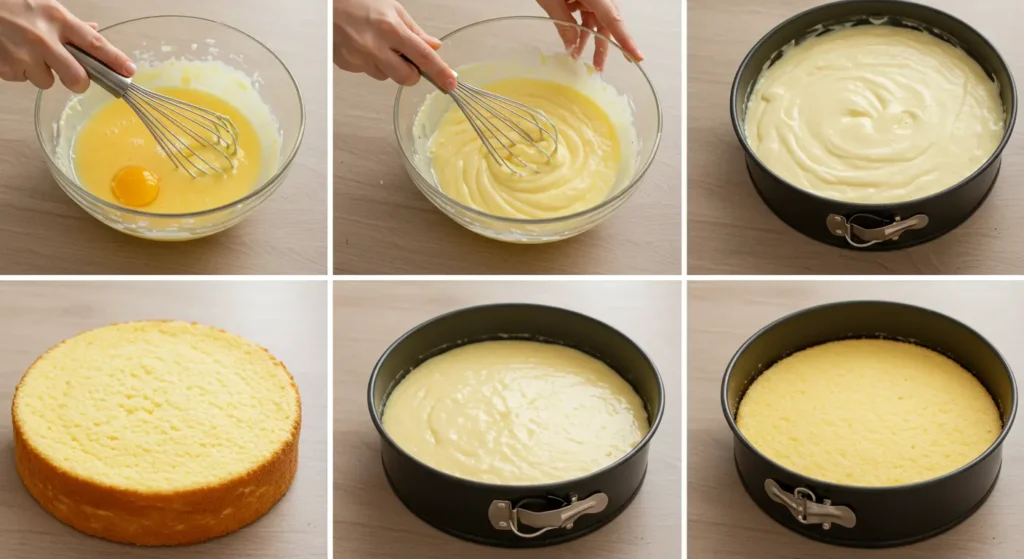
Start with the foundation of your princess cake – a light, airy sponge that will support the layers without becoming dense.
- Preheat your oven to 350°F (175°C) and line a 9-inch round cake pan with parchment.
- Beat eggs and sugar until the mixture triples in volume and forms pale ribbons when the beater is lifted.
- Gently fold in sifted flour in three additions, maintaining as much air as possible.
- Incorporate melted butter and vanilla with minimal mixing.
- Bake for 25-30 minutes until golden and springy to touch.
- Cool completely before slicing horizontally into three even layers.
Pro tip: Use a serrated knife and a slow, gentle sawing motion for clean cake layers. Refrigerating the cake for 30 minutes before slicing helps prevent crumbling.
Step 2: Create the Custard Filling
The vanilla custard adds rich flavor while providing structure to support the dome shape.
- Heat milk with split vanilla bean until steaming (not boiling).
- Whisk egg yolks, sugar, and cornstarch until pale.
- Temper the egg mixture by slowly adding hot milk while whisking.
- Return mixture to pan and cook over medium heat until thickened, stirring constantly.
- Strain through a fine-mesh sieve, cover surface directly with plastic wrap, and refrigerate until cold.
Pro tip: If your custard develops lumps, blend it briefly with an immersion blender for a smooth texture.
Step 3: Assemble the Layers
Building the cake properly creates distinct layers that showcase the classic princess cake cross-section.
- Place bottom cake layer on a serving plate and brush lightly with simple syrup.
- Spread half the custard evenly to the edges.
- Add middle cake layer, brush with syrup, and spread remaining custard.
- Top with final cake layer (bottom side up for a flat surface).
Pro tip: Use a cake ring or springform pan without the bottom to keep layers aligned and create a clean edge.
Step 4: Create the Dome Shape
The distinctive dome of whipped cream is what gives princess cake its elegant profile.
- Whip cold heavy cream with powdered sugar until firm peaks form.
- Spread a thin layer of cream over the top and sides of the cake as a crumb coat.
- Use remaining cream to build a smooth dome shape on top.
- Refrigerate for at least 1 hour to set the shape firmly.
Pro tip: For a perfect dome, use a large rounded bowl as a guide for the shape, removing excess cream with a spatula.
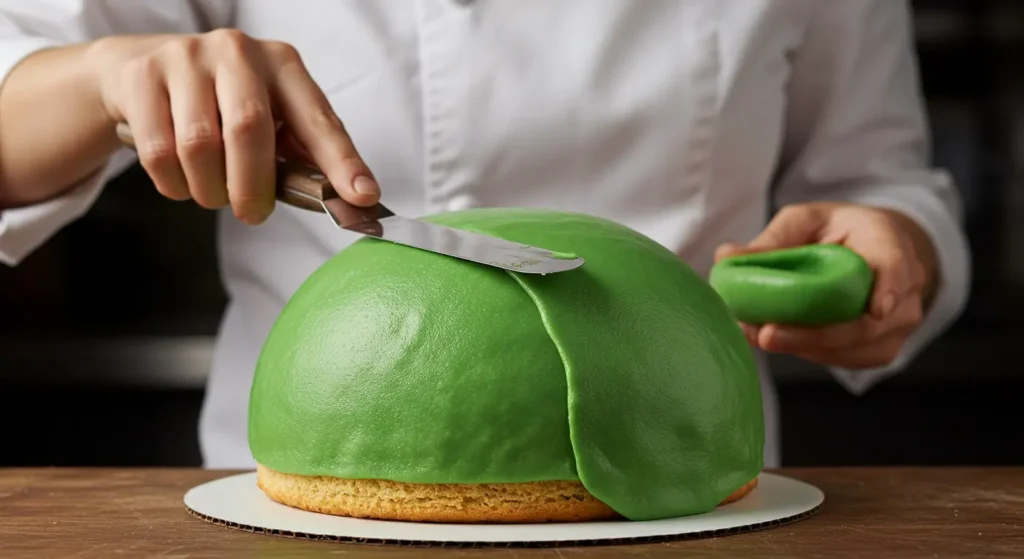
Step 5: Apply the Marzipan Covering
The green marzipan blanket transforms your creation into an authentic princess cake.
- Dust work surface with powdered sugar and roll marzipan into a 16-inch circle (about ⅛ inch thick).
- Carefully lift marzipan over the cake, centering it on the dome.
- Working quickly but gently, smooth the marzipan downward from the center, eliminating air bubbles.
- Trim excess at the bottom and tuck edges underneath.
- Finish with a small pink marzipan rose and a light dusting of powdered sugar.
Pro tip: Keep your hands lightly dusted with powdered sugar to prevent sticking, and use a fondant smoother for the most polished finish.
Pro Tips for Perfect Princess Cake
Avoiding Common Pitfalls
- Prevent Soggy Cake: Apply a thin layer of melted white chocolate to each cake layer before assembly to create a moisture barrier.
- Smooth Marzipan: If your marzipan tears or develops cracks, knead in a few drops of water to make it more pliable.
- Dome Stability: If your whipped cream dome won’t hold its shape, stabilize it by dissolving 1 teaspoon of gelatin in 2 tablespoons of water and folding it into the cream.
Tool Recommendations
- Cake turntable for smooth frosting application
- Offset spatula for precise custard spreading
- Acetate cake collar for clean layer assembly
- Fondant smoother for professional marzipan finish
Storage & Serving
Princess cake tastes best when the flavors have had time to meld. Make it 24 hours ahead and refrigerate. Remove from refrigeration 30-60 minutes before serving for the best texture and flavor. Leftovers will keep refrigerated for up to 3 days.
Flavor Variations
Seasonal Twists
- Spring Princess: Add fresh berries between layers and decorate with edible flowers
- Autumn Princess: Incorporate thin layers of apple compote and warm spices like cardamom
- Holiday Princess: Add orange zest to the custard and decorate with cranberries
Dietary Adaptations
- Gluten-Free: Substitute a gluten-free flour blend with added xanthan gum
- Dairy Alternatives: Use coconut cream for whipping and plant-based milk for custard
- Less Sweet Version: Reduce sugar in all components by 25% for a more European-style dessert
Global Inspirations
- Japanese Matcha Princess: Flavor custard with matcha powder and use matcha-colored marzipan
- American Princess: Add a layer of raspberry jam for a sweeter, more pronounced flavor
- Italian Princess: Incorporate amaretto liqueur in the cake soak and add crushed amaretti cookies between layers
Serving Suggestions

Princess cake is traditionally served with coffee for fika (Swedish coffee break) but pairs beautifully with:
- Hot tea, especially Earl Grey or bergamot varieties
- Fresh berries and mint garnish
- A glass of sweet dessert wine like Moscato d’Asti
- Vanilla ice cream for a temperature contrast
For a complete Swedish experience, serve princess cake as the finale to a meal of Swedish meatballs, lingonberry sauce, and boiled potatoes.
FAQs
Can I make princess cake in advance? Yes! Princess cake actually improves with 24 hours of resting in the refrigerator, allowing flavors to meld. The marzipan keeps the cake fresh for up to 3 days.
My marzipan is cracking when I try to cover the cake. What am I doing wrong? Your marzipan may be too dry or rolled too thin. Try kneading in a few drops of water and rolling to ⅛ inch thickness. Work quickly as marzipan dries out with exposure to air.
Can I freeze princess cake? While possible, freezing isn’t ideal as the textures can change. If necessary, freeze without the marzipan covering, then thaw in the refrigerator and apply fresh marzipan before serving.
Where did princess cake originate? Princess cake was created in the 1920s by Jenny Åkerström, a Swedish home economics teacher who taught Sweden’s three princesses. It was originally called “green cake” before being renamed to honor the princesses who loved it.
What makes princess cake different from other layer cakes? The defining features are the dome shape, green marzipan coating, and specific layer combination of sponge cake, custard, and whipped cream – all balanced to create a harmony of textures and not-too-sweet flavors.
Conclusion
Creating a princess cake is a delightful journey into Swedish baking tradition that rewards patience with incredible results. While it requires multiple components, breaking the process into our five manageable steps makes this iconic dessert accessible to home bakers of all skill levels. The combination of light sponge, rich custard, and fluffy cream crowned with marzipan creates a truly special dessert experience that’s worth every minute spent.
Don’t be intimidated by its elegant appearance – with this guide, you have everything needed to create bakery-quality princess cake in your own kitchen. Share your creation with friends and family for a memorable end to any gathering, or simply enjoy a slice with afternoon coffee in true Swedish tradition.
Ready to experience this Swedish classic? Gather your ingredients and start your princess cake adventure today!
Call to Action
Now that you’ve discovered the secrets to creating an authentic Swedish princess cake, it’s time to bring this elegant dessert into your own kitchen! Don’t let the stunning appearance intimidate you—with our five-step method, you can create this showstopping classic that will have everyone thinking you studied at a European pastry school.
Share your princess cake creation on social media using #PrincessCakeMaster and tag us to be featured in our monthly baking spotlight. Our community loves seeing the creative variations bakers add to this classic recipe!
Want more Swedish dessert inspiration? Subscribe to our newsletter for exclusive recipes, tips, and techniques delivered straight to your inbox. New subscribers receive our free “Scandinavian Desserts” e-book featuring ten traditional recipes including semlor, kladdkaka, and more.
Have questions while making your princess cake? Join our Facebook baking group where experienced bakers (including our pastry chef contributors) are ready to troubleshoot any issues and celebrate your successes.
Ready for your next baking adventure? Bookmark our collection of European cake classics and work your way through these timeless recipes that have delighted dessert lovers for generations.
Happy baking—your perfect princess cake awaits!