
Introduction: A Taste of Comfort, Made Easy
Picture this: It’s a busy weeknight, and you’re craving a warm, comforting meal that feels like home. You know the kind—crispy, golden fried chicken with that satisfying crunch followed by tender, juicy meat. It sounds like a dream, right? Now imagine getting that dream on your plate in just 30 minutes.
Well, you don’t need a ton of time to whip up Simple Fried Chicken Maryland Style. In fact, this recipe delivers everything you love about traditional Maryland fried chicken—the crispy crust, the juicy meat, and the perfect blend of spices—all in just half an hour.
Whether you’re cooking for yourself or your family, this easy-to-follow recipe lets you enjoy all the flavor of a well-made fried chicken without hours of prep. Ready to dive in? Let’s get cooking!
Table of Contents
What Makes Simple Fried Chicken Maryland Style Special?
When you think of fried chicken, your mind might immediately wander to the crispy Southern-style variety. However, Maryland-style fried chicken has its own unique twist that sets it apart. So, what makes Maryland-style fried chicken so special? Let’s break it down.
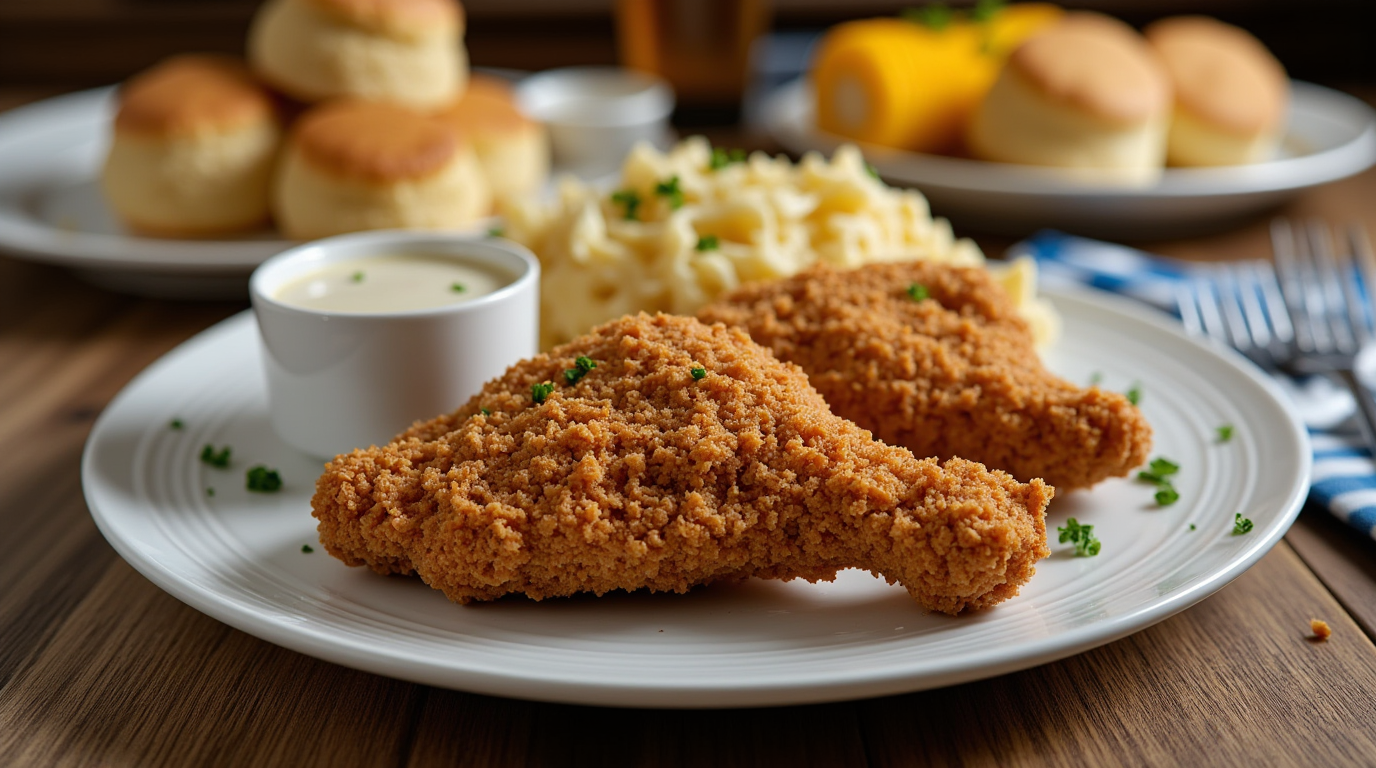
Maryland-style fried chicken is often known for its crispy golden crust and tender, juicy interior. Unlike Southern fried chicken, which tends to be coated in a thicker batter, Maryland-style chicken gets its light, crispy texture from a delicate, seasoned flour coating. The use of buttermilk helps tenderize the chicken and creates that perfect contrast between the crunch of the crust and the juiciness of the meat.
Additionally, Maryland-style fried chicken is typically seasoned with a blend of spices that can include garlic, paprika, and cayenne pepper, giving it a bit of a spicy kick. However, it’s not just about the heat; there’s a deep, savory flavor in each bite that comes from the combination of seasonings and the way the chicken is fried.
For this particular recipe, we’re sticking with simple ingredients and an approach that’s easy for even beginners. But if you’ve had Maryland fried chicken before, you’ll recognize the signature flavor and crunch in every bite!
Ingredients for Quick and Tasty Maryland-Style Fried Chicken

Before you get started, let’s gather the ingredients you’ll need for this quick, tasty fried chicken. Fortunately, the list isn’t long, and many of these items are pantry staples you likely already have.
Here’s what you’ll need:
| Ingredient | Amount |
|---|---|
| Chicken pieces (drumsticks or thighs) | 6-8 pieces |
| Buttermilk | 1 cup |
| All-purpose flour | 1 ½ cups |
| Cornstarch | 2 tablespoons |
| Garlic powder | 1 teaspoon |
| Onion powder | 1 teaspoon |
| Paprika | 1 teaspoon |
| Ground black pepper | ½ teaspoon |
| Cayenne pepper (optional) | ¼ teaspoon |
| Salt | 1 teaspoon |
| Vegetable oil (for frying) | 3 cups |
Optional:
- Fresh parsley for garnish (optional but adds a pop of color).
How to Make Maryland-Style Fried Chicken in 30 Minutes
Now, let’s jump into the step-by-step process of making this quick and tasty Maryland-style fried chicken. You’ll be enjoying your meal in no time!
Step 1: Prepare the Chicken
To get started, the first thing you’ll want to do is prepare your chicken. If you’re using chicken drumsticks or thighs, make sure they are defrosted (if frozen) and patted dry with paper towels to remove any excess moisture. This helps the batter adhere better and ensures the chicken gets nice and crispy when frying.
Once dry, place your chicken in a large bowl and pour the buttermilk over the pieces. Make sure all of the chicken is submerged. The buttermilk helps tenderize the chicken and adds flavor. If you’ve got time, let the chicken marinate for about 10 minutes. However, if you’re in a rush, you can skip this step and get straight to the next one.
Step 2: Make the Flour Coating
While the chicken is soaking in the buttermilk, it’s time to prepare the seasoned flour mixture. In a separate shallow dish, combine the following ingredients:
- All-purpose flour (1 ½ cups)
- Cornstarch (2 tablespoons) – This helps make the crust extra crispy.
- Garlic powder (1 teaspoon)
- Onion powder (1 teaspoon)
- Paprika (1 teaspoon)
- Ground black pepper (½ teaspoon)
- Cayenne pepper (¼ teaspoon, optional for a bit of heat)
- Salt (1 teaspoon)
Stir the mixture well to combine all the ingredients evenly.
Step 3: Coat the Chicken
Now comes the fun part—dipping the chicken into the seasoned flour! Carefully remove each piece of chicken from the buttermilk and dredge it in the flour mixture, making sure to coat it thoroughly on all sides. Shake off any excess flour to avoid clumps.
Pro Tip: For an extra-crunchy crust, you can dip the chicken back into the buttermilk one more time and then coat it in the flour again for a double coating. This adds an extra layer of crunch that you’ll love!
Step 4: Heat the Oil
In a large, heavy-bottomed skillet or deep fryer, heat vegetable oil (about 3 cups) over medium-high heat. You’ll want the oil to be at 350°F (175°C) for frying. You can test this by dropping a small amount of flour into the oil—if it sizzles right away, it’s ready.
Step 5: Fry the Chicken
Carefully add the coated chicken pieces to the hot oil, making sure not to overcrowd the pan. Overcrowding can cause the temperature of the oil to drop, which results in soggy chicken. Fry the chicken in batches if needed.
Cook each piece for about 8-10 minutes per side, or until the chicken is golden brown and the internal temperature reaches 165°F (74°C). You may need to adjust the heat to ensure the chicken cooks evenly without burning.
Step 6: Drain and Serve
Once the chicken is perfectly golden and crispy, remove it from the oil and place it on a plate lined with paper towels to drain any excess oil. Let it rest for a few minutes to allow the juices to settle.
For a little extra flavor, you can sprinkle some freshly chopped parsley over the chicken as a garnish. Serve it up with your favorite sides, and you’re good to go!
How to Serve Maryland-Style Fried Chicken

Now that your fried chicken is ready, you might be wondering what to serve with it. Here are some classic sides that pair perfectly with Maryland-style fried chicken:
- Mashed potatoes – Creamy mashed potatoes are the perfect comfort food to go with crispy chicken.
- Coleslaw – The cool, tangy flavors of coleslaw provide a refreshing contrast to the rich fried chicken.
- Corn on the cob – Grilled or boiled corn on the cob adds a nice sweetness to balance out the spices in the chicken.
- Biscuits or cornbread – Soft, fluffy biscuits or cornbread are always a hit alongside fried chicken.
- Pickles – A few crunchy pickles can add a zesty touch that complements the savory flavors of the chicken.
Frequently Asked Questions (FAQ)
Q1: Can I use other parts of the chicken for this recipe?
Yes! While drumsticks and thighs are the most commonly used cuts for fried chicken, you can use chicken breasts or wings if you prefer. Just adjust the cooking time according to the size and thickness of the pieces.
Q2: Can I make this recipe gluten-free?
Absolutely! If you need a gluten-free version, simply swap out the all-purpose flour for gluten-free flour and ensure your seasonings are gluten-free.
Q3: Can I bake the chicken instead of frying it?
While frying gives the chicken its signature crispy texture, you can certainly bake it. Preheat your oven to 400°F (200°C), and bake the chicken for about 25-30 minutes, flipping halfway through. Be sure to use a wire rack to allow the chicken to crisp up as it bakes.
Q4: How can I store leftover fried chicken?
Leftover fried chicken can be stored in an airtight container in the refrigerator for up to 3 days. To reheat, place it in the oven at 350°F (175°C) for about 10-15 minutes until crispy.
Conclusion: Enjoy a Maryland Classic in 30 Minutes

In just 30 minutes, you can bring the heartwarming taste of Simple Fried Chicken Maryland Style into your kitchen, creating a dish that’s crispy, juicy, and full of flavor. This recipe is the perfect balance of tradition and convenience, giving you a comforting, delicious meal without hours of preparation. Whether you’re feeding a family or treating yourself to a quick but satisfying dinner, this Maryland-style fried chicken has got you covered.
So, the next time you’re in the mood for something crispy and savory, you won’t need to look any further. With simple ingredients, a few steps, and just half an hour of your time, you’ll have a plate full of golden fried chicken that tastes just as amazing as it looks.
Ready to serve up your new favorite dish? Grab your ingredients and get frying—you’ll be savoring Maryland’s finest in no time! And remember, once you’ve mastered this recipe, you can get creative by pairing it with your favorite sides, making this classic even more versatile.
Call to Action
If you enjoyed this simple and quick Maryland-style fried chicken recipe, share it with your friends and family! And if you try it out, don’t forget to let us know how it turned out in the comments below. We’d love to hear about your experience and any personal twists you added to the recipe. Happy cooking!
We Value Your Feedback! Share Your Thoughts on Our Recipes
No Title
A must-try for fried chicken lovers!